How to change CS:GO crosshair
Brief: Do you think your crosshair could look better? Here’s how to change CS: GO crosshair quickly and easily.
In this guide you will learn 3 ways. We will show you how to do using the game options, the console and the config.cfg file.
The first two ways are ideal if you’re looking for a new crosshair or want to test new settings. The third way is best for those who have already found the right settings and want to save them for the future.
1. Change crosshair in the game options
The first way to change crosshair in CS:GO is to configure the game options.
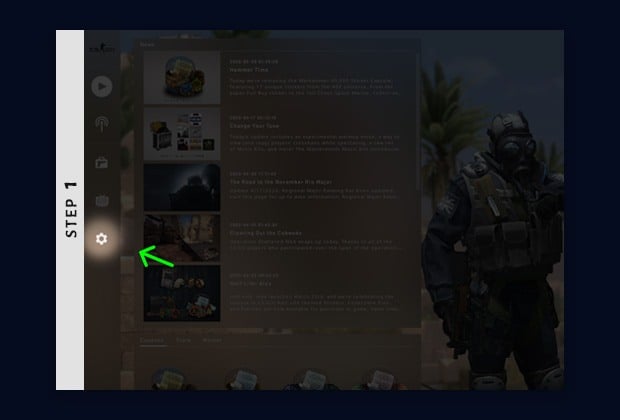
Step 1: Open the game settings
Start Counter-Strike: Global Offensive and click on the options icon on the left side of the screen.
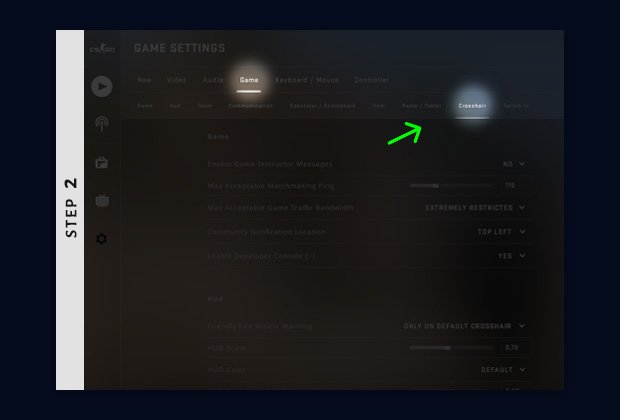
Step 2: Go to the “Crosshair” tab
After opening the game settings click on the “Crosshair” tab.
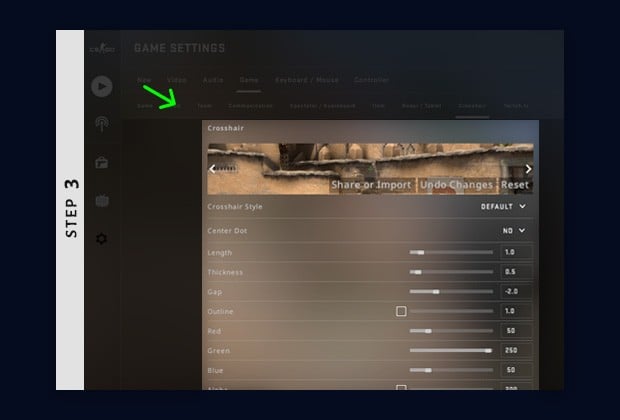
Step 3: Edit crosshair settings
Scroll down until you see the crosshair options that are responsible for the crosshair’s color and style.
2. Change crosshair in the console
The second way to change crosshair CS:GO is to use the developer console.
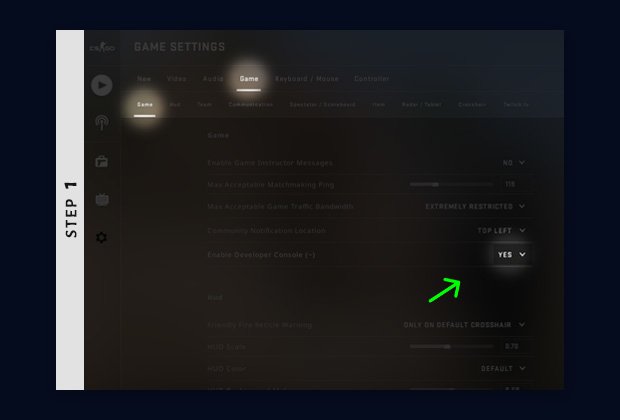
Step 1: Enable the developer console
Start by checking if the developer console is turned on in the game settings.
Step 2: Open the console and edit crosshair settings
Click the button (usually ~ button) to open the console. Then enter the settings you want to change.
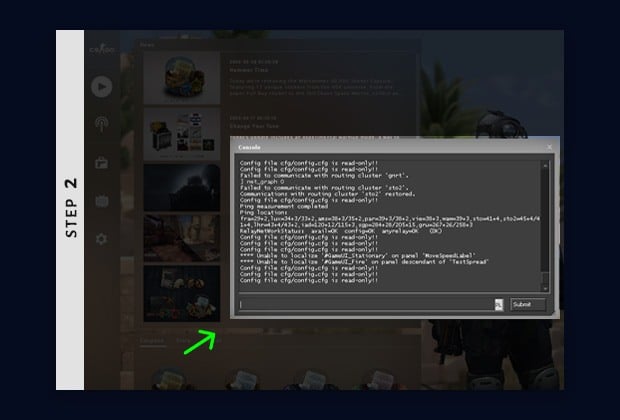
Check the CSGO pro crosshair list to copy & paste ready settings with one click.
3. Change crosshair in the config file
The third way to change your crosshair is to edit the config.cfg.
Step 1: Find the config file
Go to the folder in which the config.cfg file for your Steam account is located.
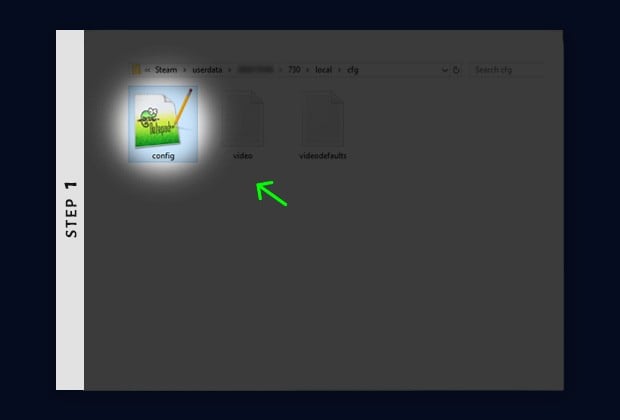
Check out what is current CSGO config location.
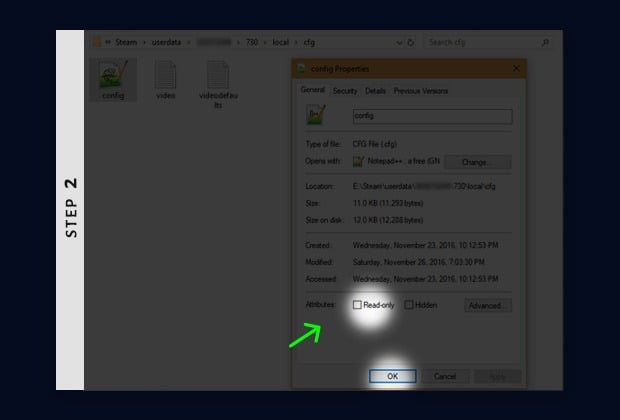
Step 2: Change the file properties
Right-click on the config file and select “Properties”. Scroll down and turn off the “Read Only” checkbox.
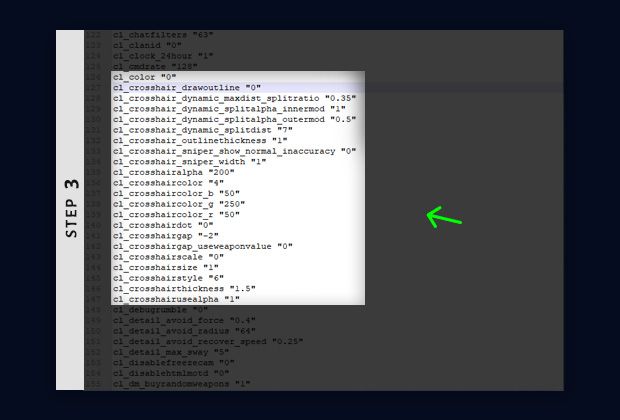
Step 3: Edit crosshair commands
Open the config file and start changing the commands related to the crosshair (cl_crosshair …).
Check out the full list of CSGO crosshair commands that you can use here.
Step 4: Save and return to file properties
After saving the changes made in the config you need to undo the change made in step 2. Go to options and enable the “Read only” option.

Summary
Let’s end this guide with a short summary and a little trick.
As you can see, you can change your crosshair in CS:GO very easily. It will probably take you no more than 2 minutes to complete.
You can do this in one of three ways:
- by editing game settings,
- by entering commands in the console,
- by changing the config file.
The first two ways are good in the short term, because the changes will be reset when you restart the game. The last way seems to be the smartest in the long run, because it saves your settings for the future.
It’s really a great and useful piece of information. I’m satisfied that you shared this helpful information with us. Please keep us up to date like this. Thank you for sharing.
You’re welcome, mate! Thanks for being with us.